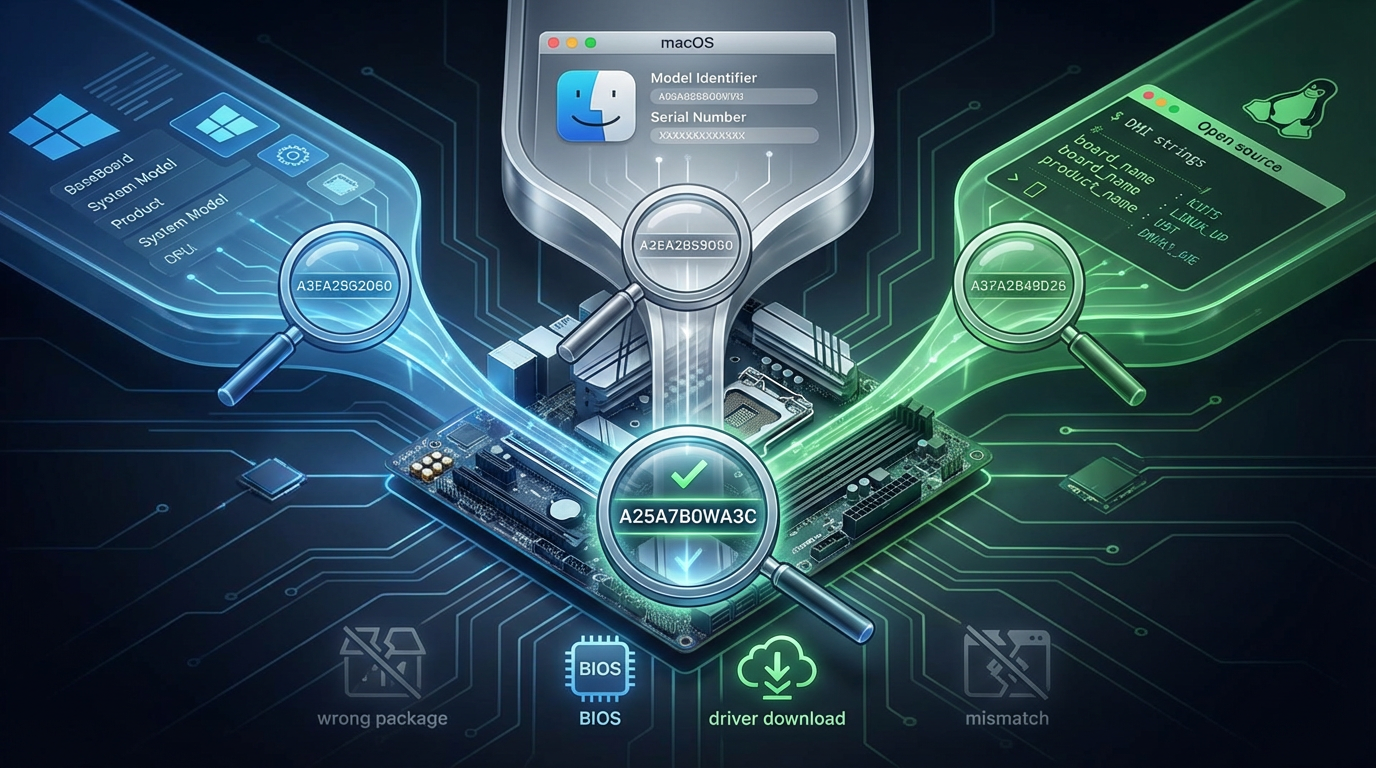
You need the exact board name—but Windows/macOS/Linux all call it something different
You usually start by opening System Information and copying whatever looks like a model name. Then you paste it into a support page and realize it doesn’t match anything you can download. That happens because your computer exposes more than one “name,” and each operating system chooses different labels: Windows may show a BaseBoard product string, a system model, and a vendor name; macOS tends to surface the Mac model, not the logic-board model; Linux often shows DMI strings that can be generic.
The consequence is simple: you can pick the wrong BIOS or driver package, especially on OEM laptops and prebuilt desktops where the board is custom. The fix is also simple—treat this like an ID check, not a guess, and pull a few specific fields the right way on your OS.
On Windows, which label should you trust: BaseBoard, Product, or System Model?
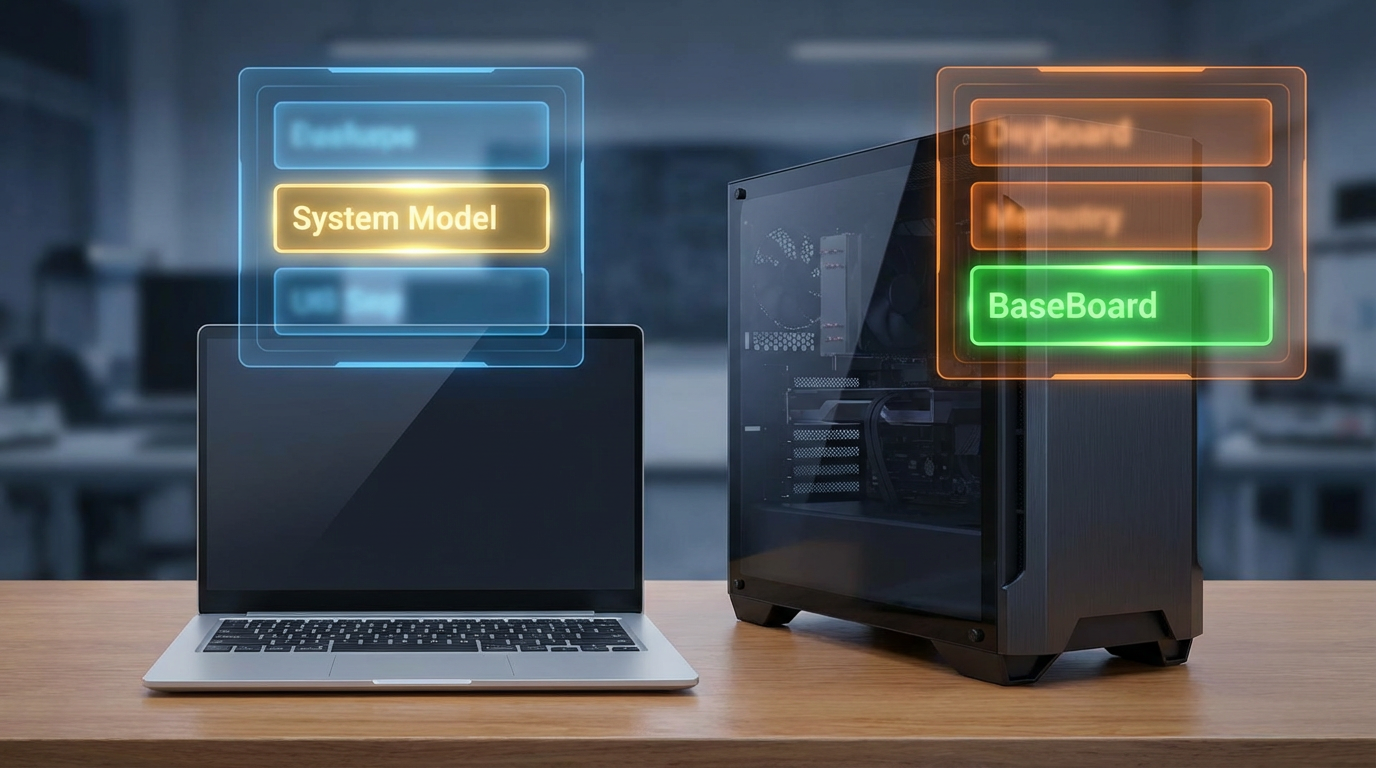
On Windows, you’ll often see three “names” for the same machine, and they don’t carry the same weight. You might run a command and get a BaseBoard “Product” that looks like a real motherboard model, a “System Model” that looks like a retail PC name, and a “Product” value that’s just a short code. If you pick the wrong one, you end up on the wrong support page.
Start by trusting the identifier that matches how updates are shipped. On OEM laptops and prebuilts, that’s usually the System Model (the model the vendor sells and supports), because BIOS and drivers are almost always published per system, not per motherboard. The BaseBoard fields are helpful when they look specific (for example, a clear ASUS/Gigabyte board model), but they’re often generic or vendor-internal on OEM systems.
The practical friction: Windows can show a legitimate retail-board string on a desktop you built, and total nonsense on a branded laptop. So you’ll pull all three fields, then decide which one is actually “searchable” before you download anything.
When Windows gives you a real motherboard model: the quickest paths (and what to copy/paste)
When the BaseBoard “Product” line looks like a retail motherboard model (think “B550 AORUS ELITE” or “PRIME Z790-P”), you can usually stop hunting and use that as your lookup key. This is most common on a desktop you built yourself or a prebuilt that uses an off-the-shelf board. In that case, you want the board model string exactly as shown, including spaces and revision tags.
The quickest pull is Command Prompt or PowerShell. Run: wmic baseboard get manufacturer,product,version,serialnumber. Copy/paste the Product value first, then keep Version (often the board revision like “Rev 1.0”) with it, because many vendors split BIOS and manuals by revision. If WMIC isn’t available, open System Information and copy BaseBoard Product and BaseBoard Version from the summary.
One common snag: the string is real, but your support downloads still don’t match because Windows is showing the board family, not the exact sub-variant. That’s when the next-best identifier matters.
If Windows shows nonsense or a custom OEM board, what’s the next-best identifier?
That “board family” snag is also what you’ll see on many OEM systems—except the BaseBoard fields won’t even look real. You’ll get placeholders like “To be filled by O.E.M.”, a short internal code, or a string that returns zero search results. In that situation, stop treating the motherboard as the supported unit and switch to the identifier the vendor actually ships updates against: the system model, plus its SKU or product number.
In Windows, pull these from System Information: System Model and System SKU (sometimes shown as “SKU Number”). If System SKU is blank, use the vendor’s own product ID: on HP it’s often a product number like “xxxxx#xxx,” on Lenovo it’s a machine type like “20XX-YYYY,” and on Dell it’s usually the Service Tag. That extra code is the difference between “same model name, different motherboard.”
The trade-off is annoying but real: the same marketing name can cover multiple board variants, so the model alone can still land you on the wrong download page. When you’re one click away from BIOS or chipset drivers, the next check is whether the support site lets you filter by that SKU/product ID.
macOS reality check: you usually won’t get a motherboard model—so what do you use instead?

That same “one marketing name, multiple board variants” problem shows up on Macs too—except macOS usually won’t even try to show you a logic-board model you can search. You’ll see a Mac model identifier and a serial number, and that’s what Apple and most parts catalogs actually key off.
On the Mac, grab the Model Identifier (like MacBookPro16,1) and the Serial Number. The fastest path is Apple menu → About This Mac for the basics, then System Information for the exact strings. In Terminal, you can also run: system_profiler SPHardwareDataType and copy Model Identifier and Serial Number.
The trade-off: Model Identifier is great for “which generation is this,” but it may still cover small mid-cycle changes. If you’re ordering a part or matching firmware, use the serial on the vendor’s lookup tool, and only fall back to Model Identifier when you have to.
Linux: choose between DMI strings and a physical label when the data looks generic
That “use the identifier the vendor actually keys off” rule still applies on Linux, but the first thing you’ll see is usually a set of DMI strings—and they can be either perfect or useless. On a self-built desktop, they often read like a real retail board. On an OEM laptop or a whitebox mini PC, they may be generic (“Default string,” “To be filled by O.E.M.”) or just the system name.
Start with what Linux exposes without guesswork: sudo dmidecode -t baseboard -t system, or read the strings directly from /sys/class/dmi/id/ (board_name, board_vendor, board_version, product_name, product_sku, sys_vendor). If board_name looks like a real motherboard model, use it along with board_version (often the revision). If it looks generic, switch to product_name plus product_sku, because that’s what OEM support pages and BIOS bundles tend to target.
The friction: DMI data can be wrong, and some systems reuse the same product name across variants. If you’re about to flash BIOS or order a board-level part, a quick physical check (sticker on the board, silkscreened model/rev near the PCIe slots or RAM) can beat software—and then you can sanity-check it before downloading anything.
Before you download anything: a quick mismatch checklist to avoid the wrong BIOS/driver
That sanity-check step matters most right before you click “BIOS” or “chipset.” Do a fast mismatch scan: does your identifier include a SKU/product number (OEM) or a board revision like “Rev 1.0” (retail boards)? If not, pause and pull it. Confirm the CPU generation and chipset family match the download page, because vendors often keep near-identical names across years.
Watch for subtle traps: the same model name with different suffixes (like “G1/G2,” “-A/-B,” “14-xxx” vs “15-xxx”), laptop “series” pages that hide multiple submodels, and Windows showing a board family while the vendor posts BIOS per sub-variant. If anything feels off, use the serial/service tag lookup or check the board label before you install.